Simple Birthday Card with Punched-out Butterfly Design
by Jenny Jean
(Singapore)

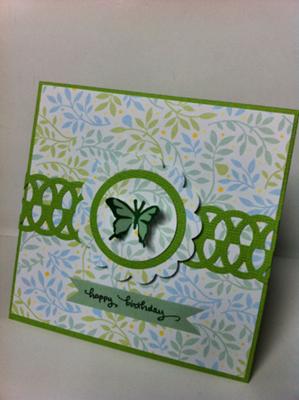
Finished Birthday Card

A handmade card is always a treat to receive simply because you know that the giver put in plenty of creativity and heart into making it.
Here is a simple and easy card to make. It will surely bring a smile to whoever receives it.
The finished card is very versatile and can bear whatever sentiment you will it.
Basically, you only need a 4in x 4in card base, a slightly smaller patterned paper to fit on the front of your card base, a few punched out pieces for decorations: 4in x 1in cardstock strip punched on both its long sides with an edger punch, a scalloped circle, a circle. You will also need adhesives: glue stick, double-sided tape, and foam tape.
These are the procedures for putting the card together.
1. Take your patterned paper and stick double-sided tape on the edges of its backside.
2. Tape this on the front side of your card base.
3. Glue the back of the cardstock strip with the punched out edges. This goes horizontally on the centre of you card's front side.
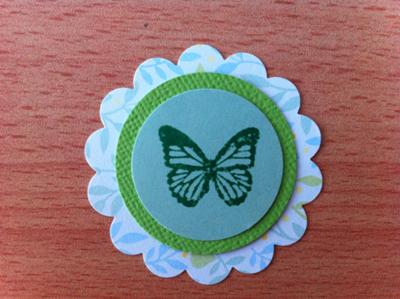
4. Glue together the scalloped circle and circle pieces. The circle piece sits at the front centre of the scalloped circle.
5. Stick a bit of foam tape at the back of the scalloped circle. Tape this at the centre of the card just over the "belt".
Essentially, this is your completed card. Now it is up to you to finish it off by adding your choice of embellishments, stamps, and sentiment.
For our example, I have made it to carry a Happy Birthday sentiment and a little punched out butterfly decoration.
You may find more ideas for versatile cards to make on my blog, Cookie Adventures.
Comments for Simple Birthday Card with Punched-out Butterfly Design
|
||
|
||
|
||
|
||
|
||


