Homemade Valentine Cards
~Love Sign~
Homemade valentine cards are so much fun (not to mention romantic!) to make and they always give an extra special touch to someone's Valentine's Day! Learning how to make homemade valentine cards is easy and we'll be with you every step of the way! :)
Our tutorials on handmade Valentine cards are specially designed to look elegant but at the same time easy on the pocket and, most importantly, doable. So if you're a beginner, you've come to the right place! These cards are all fun and easy to make! :)
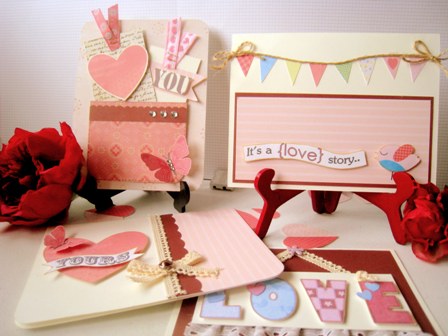
On this page, we will give you a list of materials and supplies and a full blown, step-by-step tutorial on how to make this Valentine card idea:

Looking for a tutorial on another Valentine card idea? You can click here to go to our main page on Homemade Valentine Cards and choose another Valentine card idea there! :)
Materials and Supplies:
- cream cardstock for card base
- cream cardstock for the love sign
- dark brown cardstock
- sentiment. I printed and cut out the letters L, O, V and E from the Paper Valentines Alphabet Collection
- ruffled lace
- lace or baker's twine for "hanging" the sign
- a brad/pearl/rhinestone
- Decorative scissors - large scallop or cloud edge (Available in Amazon
)
- Adhesive - double-sided tape, foam tape or pop dots, hot/fabric glue
- Scissors
- Slot Punch
Procedure:
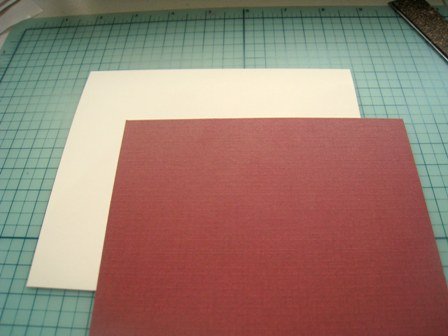
Start by making your card's base using the cream cardstock. Cut to desired size. Mine measures 5.5" x 6.5". Then, take out and cut your brown cardstock to a size smaller than the cream cardstock by around 1/4 inch on all sides.
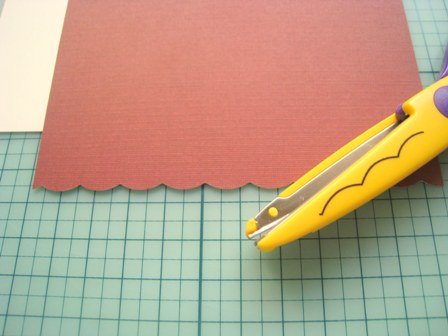
Run your decorative scissors along the bottom edge of your brown cardstock.
Prepare the sentiment you've chosen as your card's focal point. I printed and cut these letters to form the word "LOVE" and I think they worked perfectly for this Valentine card idea!
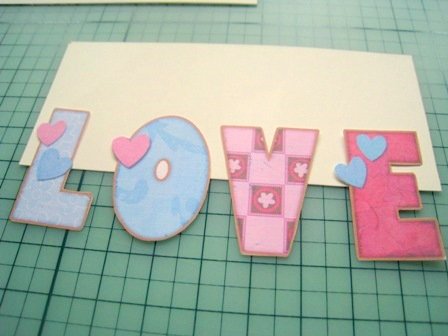
Leaving at least 1/2 inch of space at the top, mount your sentiment onto a piece of cream cardstock using pop dots or foam tape. If you're also working with letters, a good tip is to start with the first and last letters first before putting in the middle letters. This is so you can estimate the margins on both sides and avoid problems like running out of space for the last few letters.

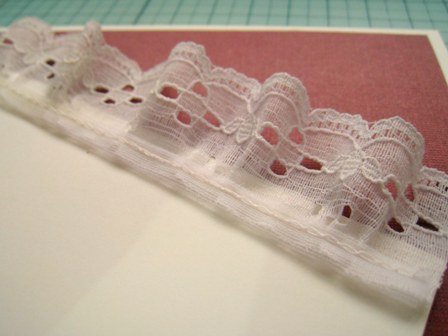
Next, flip the sign over and run some ruffled lace along the bottom edge. Adhere using hot/fabric glue.
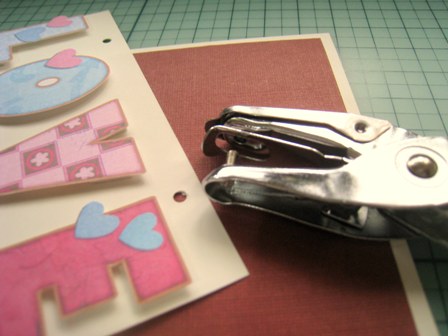
Using a slot punch, punch a hole an inch from the left edge and another one an inch from the right edge.
Add in some lace trimmings or baker's twine or anything you'd like to "hang" your sign with. Knot the ends to keep it in place.
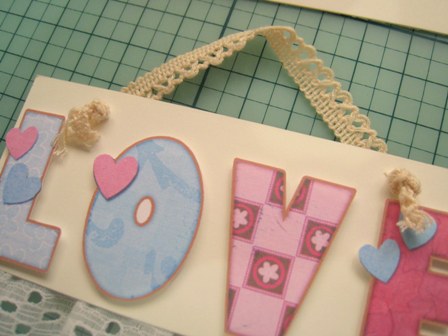
Position your sign on the center of your card and adhere using foam tape or pop dots to give it extra dimension.
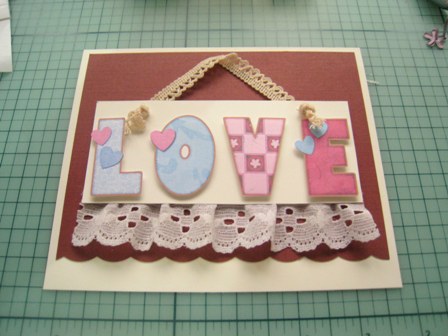
To give the illusion that the sign is hanging on something, add in a brad for a finishing touch!
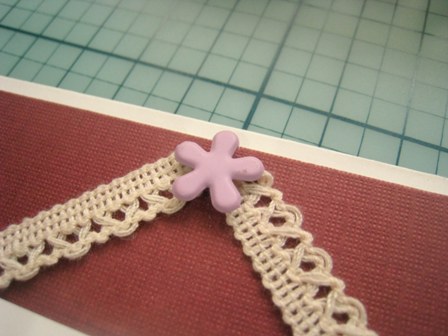
Didn't I tell you it was fun and easy? :) Hope you had fun!
We try our best to make our tutorials as easy to follow as possible. But if at some point a question popped into your head, please don't hesitate to ask us as we would be more than happy to help. :) Please use this form to contact us.
Free Newsletter
We constantly strive to update this site and add in new card ideas and tutorials so if you haven't already, please subscribe to our free newsletter so we can always let you in on what’s new. :)
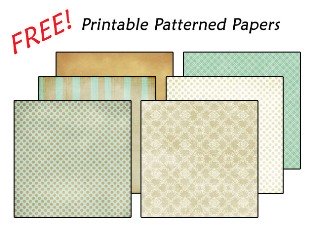
As a thank you, we’ll send you a download link to a gorgeous digital scrapbook paper pack that you can print and use for craft projects or any way you want! :)
Not the papers-scissors type? Would love to make a unique Valentines card but in a rush? Our collection of printable Valentine cards is the perfect solution! The best part? They're absolutely FREE!
Done here? You can choose another Valentine card tutorial by going to our main page on Homemade Valentine Cards.
You can also browse through our navigation bar on the left. We've got lots more card ideas and more beautiful love cards too!
Lastly, you can go back to Let's Make Greeting Cards' Homepage.
Thanks for dropping by! :)


