Summer Fun Homemade Card Ideas
Free homemade card ideas to inspire you to start making handmade cards for friends and loved ones! On this page, DT Member Ruth will teach you how to make a fun summer card perfect for the fun and happy season!
Summer Fun Card
By Ruth Wu
Hi, all! I'm here to show you a fun-to-make summer card today!
This time I didn’t start with a sketch. I had some ideas in mind. When I think of summer, I think of sunshine, being outdoors, bright colors, flowers… and much more! So I knew for this card, I wanted to incorporate those and some of the trends I have been seeing online so much, particularly Polaroid(s) and mason jars.
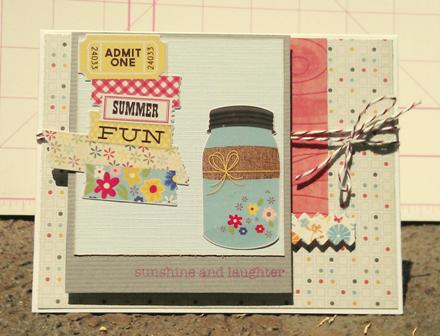
Supplies:
- Away We Go– My Minds Eye
- Everyday sayings – clear rubber stamps – Hero arts
- Summer Fresh – Simple Stories
- Color Box – archival - espresso
- Twine
Assembly:
Starting with the same card base I always use (1/4 page size), I decided to work on creating the “Polaroid” first. For this card, I measured the Polaroid base – 3 ¾ by 3 ¼ inches.
Then I cut the “light blue” inside of the Polaroid measuring about 3 ½ by 3 inches.
Now time to select what to “feature” in the Polaroid. Here is where this card is so versatile. If you decided to put a birthday cake in the Polaroid – you can make this a birthday card, if you put a wreath or presents in it, it can be a Christmas card. Don’t you just love homemade card ideas like that?
|
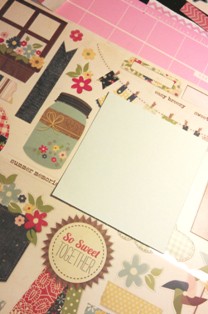
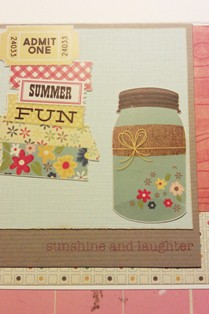
For this card, I selected a mason jar sticker from “Summer Fresh” by Simple Stories. Added that to the bottom left of the Polaroid, leaving something else from the top right hand corner. From the same sticker sheet, I selected another sticker that I thought brilliantly showcased a good summer. “washi tape, carnival ticket, FUN and more washi tape” |
 |
|
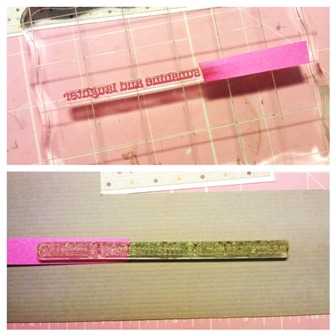
For the sentiment at the bottom, I selected a stamp that said “sending you sunshine and laughter.” Since the whole sentiment could not fit on my Polaroid, I decided to just stamp “sunshine and laughter.” To do this I used the masking technique I learned from some website awhile ago.
|
 |
|
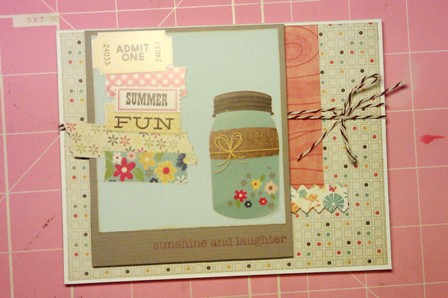
I find that using the sticky part of the post it works the best and least messy for this technique. Just mask the words you do not want inked with your post it, ink up the stamp, remove post it and stamp! And there you have the completed Polaroid – the main focus of this card. The card was still a little plain so I added an orange woodgrain paper from the same pad as the card base background – Away We Go – my minds eye. The orange really made the Polaroid stand out more.
|
 |
I noticed the mason jar had a ribbon around it and I decided to use that on my card too. (I love twine, I will use it and use it excessively given any chance for my homemade card ideas) Wrapped the twine around the card a couple of times, tied a ribbon. Adhered Polaroid with pop up tape to card and there you have it, you're done!
Thanks for creating with me today! For more homemade card ideas, you can browse through the themes on our navigation bar on the left. Enjoy making handmade cards! :)
Let's Make Greeting Cards Homepage


