[?]Subscribe To This Site
Handmade Mothers Day Card
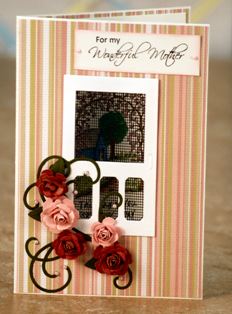
Looking for a detailed tutorial for a handmade Mothers Day card? You've come to the right page! Let Design Team Member Lisa inspire you with another idea so you can make a Mothers Day card at home!
A Beautiful Mothers Day Card
By Lisa Allen
Hey, everyone! I'm Lisa and I'm happy to be crafting with you today! We're going to make a beautiful handmade Mothers Day card today and it's going to a lot of fun. Please feel free to substitute whatever I used with whatever you have in your stash. Be creative and just let your creative juices flow.. Hope you enjoy this one.
Handmade Mothers Day Card
Finished Card Size: 8”x 5⅜”
Products Used:
- Screen Door Kit (Rubber Cottage)
- Card Stock
- White
- Green
- Pink
- Mauve
- Baby Girl Strip (Cloud 9 Designs)
- Stamps
- Mystic Hideaway HCPC 3445 (Heartfelt Creations)
- Botanical Floral 2 HCPC 3407 (Heartfelt Creations)
- Sentiments for Mom HCPC 3389 (Heartfelt Creations)
- Happy Mom’s Day (Hero Arts)
- Dies
- Rose Creations (Spellbinders)
- Belle Rose HCD 712 (Heartfelt Creations/Spellbinders)
- Memento Ink
- Tuxedo Black
- Bamboo Leaves
- Angel Pink
- Rose Bud
- Colored Pencils
- Blue
- Gray
- Green
- Dark Green
- Jade Green
- Pink
- Brown
- Dark Brown
- Mahogany
- Gamsol and Blending Stump
- Die Cut Machine
- Hot Glue Gun
- Zots
- Zig 2 Way Glue Gun
- Terrifically Tacky Tape ⅛” wide
- Pink Pearls (Want 2 Scrap)
- Paper Blossoms Molding Mat (McGill)
- Paper Blossoms Tool Kit (McGill)
How it is made:
Preparing the front of this handmade Mothers Day card:
- Cut white card at 8” 10¾”. Score at 5⅜”. This will form your card base.
- Cut a mat for the card front with the Baby Girl Strip card stock. The mat needs to be cut at 7⅞”x 5¼”. Attach to the card front making sure that it is centered.
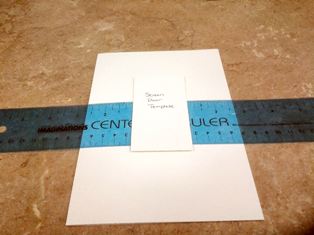
- Using a centering ruler, find the center of the card front. Then center the screen door template on the card front. Trace the screen door template and then cut out the door.
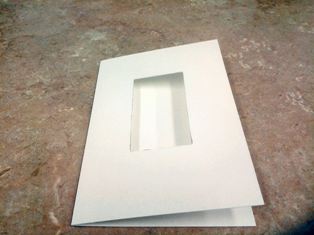
- Next it is time to assemble the screen door. Trim the screen a little smaller than the door.
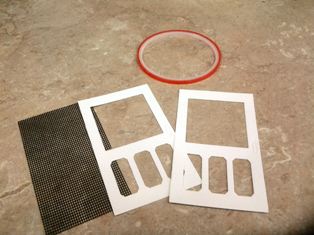
Attach the Terrifically Tacky Tape to the edge of the one of the doors and then add the screen.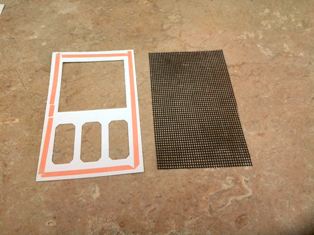
- Apply more adhesive to the screen door and then attach to the card front over the opening.
- Apply adhesive to the back of the second door along the edges and adhere the door on the inside of the card front making sure that it lines up with the door on the front of the card.
- Start by cutting another piece of the Baby Girl Strip card stock at 5¼”x 7⅞” to make a mat for the inside of the card. Adhere to the inside making sure that is centered.
- Cut a piece of white card stock at 5”x 7⅝”. Stamp outdoor scene in the center of the white card stock with the Tuxedo Black ink pad. Color the image with colored pencils and then using the Gamsol and blending stump blend the color pencils to get a soft look to your coloring.
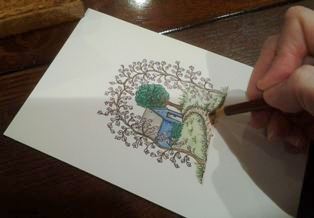
- Attach the image to the center of the inside of the card.
- Stamp the Mother’s Day message at the bottom of the image with the Tuxedo Black ink pad.

- Stamp several of the two smallest flowers from the Botanical Floral 2. Stamp Angel Pink of the pink card stock. Stamp Rose Bud on the Mauve card stock. You will need 5 petals for each of the roses.
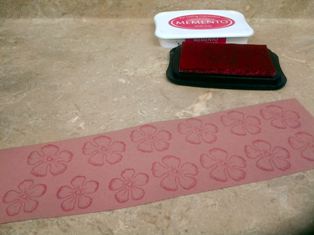
- Stamp the smallest of the leaves on the green card stock with the Bamboo Leaves Ink pad.
- After all the flower petals and leaves are stamped, cut them out using the matching die and a die cut machine.
- Start forming the roses by forming the center of the flower. Using the paper molding tools and pad shape 3 petals up and 2 petals down.
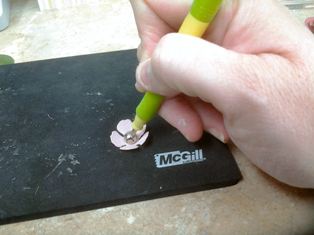
- Pick one of the petals. Curl both edges of the petal towards the center of the petal. Skip a petal and do the same to the petal. Add a drop of glue from the hot glue gun. Continue to form the 3 remaining petals around the center.
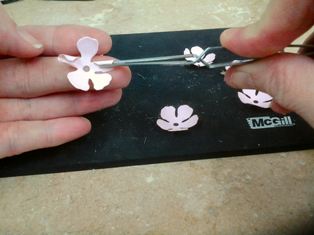
- Glue the formed center to the next layer of petals with a glue gun.
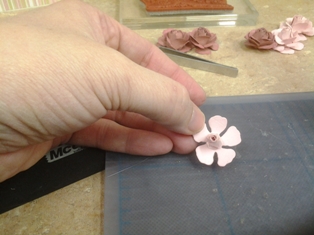
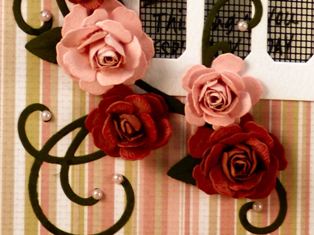
- Form the petals around the center. Glue it to the next layer of petals. Using the hot glue gun apply a little to the base of the petals and form them to the center and bend the tips of the petals slightly back. Do the same with the final two layers.
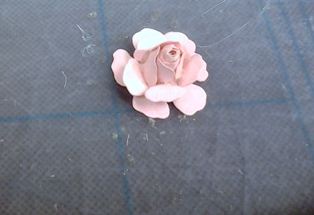
- Add the leaves to the roses as desired.
- Using a green card stock and the vine and leaf die, cut out image with a die cut machine and add to the front of the card at the bottom left corner of the screen door. I adhered the die cut with the Zig 2 Way glue pen. Add the roses as desired on the leaves and swirls using Zots to adhere.
- I then added pink pearls to the end of the swirls.
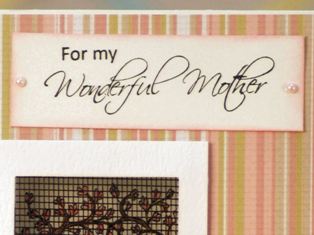
- Stamp the "Wonderful Mother" sentiment on a piece of white card stock cut at 1⅛”x 3½” with Tuxedo Black ink. I then added Angel Pink around the edge of the sentiment and then added it to the card front at the top right hand side of the card. Then add two pink pearls one on each side of the sentiment.
You can add whatever embellishments you would like and that's about it! You now have a beautiful handmade Mothers Day card!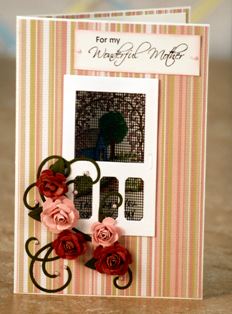
Visit our main page on Mothers Day Cards for another handmade Mothers Day card inspiration! :)
Back to Let's Make Greeting Cards Homepage


