More Fathers Day Card Ideas
More Fathers Day card ideas you say? We heard you and we've asked DT Member Ruth to show you another one with a tutorial and some photos! Enjoy making this one!
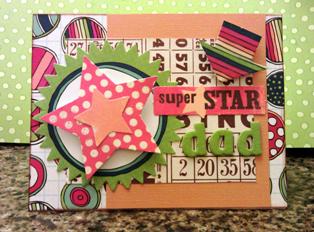
Super Star Dad
By Ruth Wu
Supplies:
- This and That – graceful – Echo Park
- Scenic Route – Surprise- Young Street
- Scenic Route – Die Cut sheet
- Wild Ride “You Are a Star” – My Mind’s Eye
- Versamark - watermark stamp pad
- Glue Dots- removable
- Stampendous – embossing powder – Detail Clear
- Tombo – permanent adhesive
- Pop-up tape from scrapbuck
Thinking about Fathers Day card ideas, I decided to try something different and sketch out my design this time. I’ve always seen card sketches online but everytime I tackle one, I seem to take it too literally and it comes out boring. So this time, I drew my own sketch and just told myself to GO HAVE FUN!
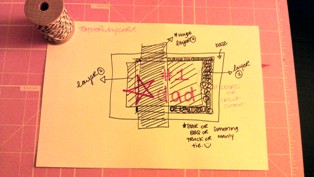
Using the Scenic Route paper pack that was gifted to me as part of this design team – I selected a “noisy” background. Trimmed it the same size as the card, adhered and done. It was a little too noisy and distracting so to tone it down a little I went to my scrap stash and used a nice mustard yellow from the Brazillian Basics 1 pound quality cardstock pack.
Manly/ boyish cards are a challenge to me. They don’t like the muted, shabby colors that I do. Fathers Day card ideas are not an exception. I needed something manly, so I went for the BINGO paper from the This and that –Grateful- Echo Park paper pack. That was now my layer 3. To give it a more manly-rough feel I decided to just brush my charcoal chalk ink on the edges of the card.
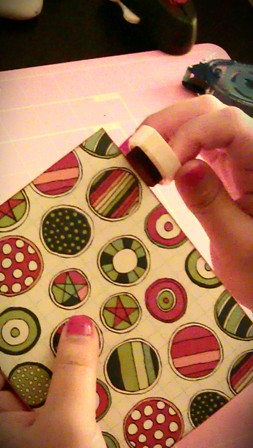
Can I let you in on a secret? This is where I got tired of cutting and measuring so Instead of that long strip down (see sketch) I decided to use a diecut shape from the scenic route collection. Selected a nice bright green circle. I love this circle because its not perfectly round. Adds character!
Next, I decided to go for a “star” theme. Recently, when I ordered stuff from allscrapbooksteals.com I was given a free gift from them and it was the “Wild Ride-You Are A Star” die cut sheet. This was perfect for Father’s Day and so decided to just use the whole set for this card.
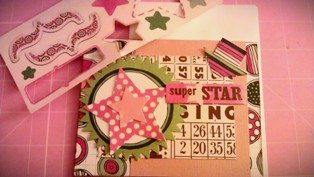
The arrow is actually from the same diecut sheet as the green circle. After laying it all out, it was missing something. Something shiny. So I decided to try something I learned from Jennifer Mcguire.
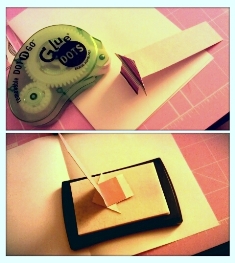
Cut a strip of paper and use a removable adhesive to stick your embellishment to it. Essentially you are just trying to create a way for you to hold on to your embellishment without melting your fingernails off later. Then you are going to cover the entire surface area of your embellishment with embossing ink/ watermark stamp/whatever you call it. My favorite embossing ink is the versamark - watermark stamp pad. Make sure you soak it in that thing nice and good. It should start to feel sticky to the touch. That’s when you know you are good to go.
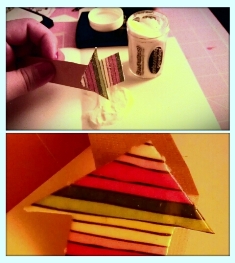
Next, continue as you would if you were embossing a stamped image but just repeat multiple times. For this arrow, I repeated the process about five times. And the final product was a nice thick glossy arrow. Alternatively, you can use glossy accents if you have it. The one upside to this process though is that it dries immediately whereas with glossy accents, you normally have to set it out overnight to dry. Once you are satisfied with how “thick” you have your arrow, you can remove your paper strip holder and stick the arrow on the card.
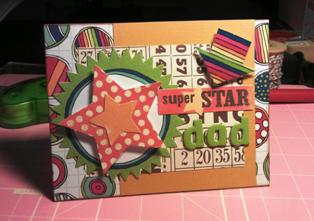
Almost done! Now for the words. Here is another versatile card that you could probably substitute the words for Happy Birthday or Good Job or something along those lines.Since this card is for father’s day, I just use the alphabets from Thickers and simply stuck “DAD” on so that now it reads Super-Star dad! YAY
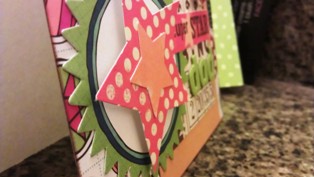
Note: I wanted to add different dimensions to this card so I used pop-up tape for the polka-dotted star and the arrow. Here is a side view of the card.
All done! Thanks for reading and don't forget to check out other Fathers Day Card Ideas we have for more inspiration!!
More Fathers Day Card Ideas
Let's Make Greeting Cards Homepage


