Easy-to-Make I Love You Card
by Mai Garcia
(Manila, Philippines)
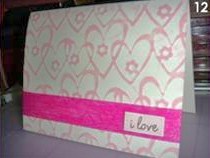
Easy-to-Make I Love You Card
For this card, I wanted to go for a simple style with just a subtle (I tried!) hint of Valentine's. This is very easy to make, and not to mention, cheap! Don't we like that all?
For the materials, you'll need:
- 8.5in x 5.5in white cardstock
- 6.5 in pink ribbon
- rubber stamps
- pink ink pad
- embossing plate (Sizzix heart to heart)
- scissors
- adhesives
Optional materials:
- scoring tool (if you don't have a scoring board, you can simply fold your card in half)
- embossing machine (it may be hard to believe, but you can actually trace the template to emboss your paper - it may take time and may need lots of effort, but it's doable :))
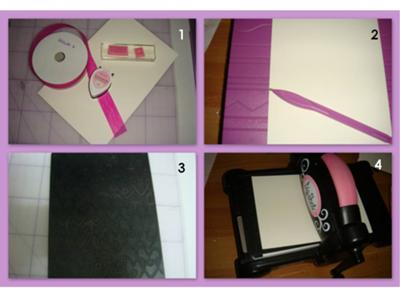
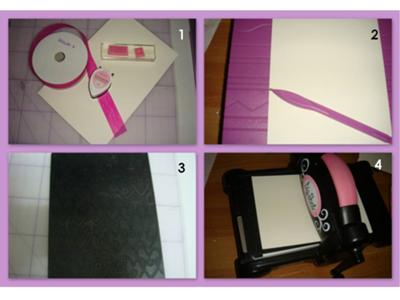
Photo 1 Materials
Photo 2 Score the cardstock in half. It is best to use a scoring tool for a more professional look.
Photo 3 A close-up of the template I used
Photo 4 Running the cardstock onto the Sizzix Big Shot
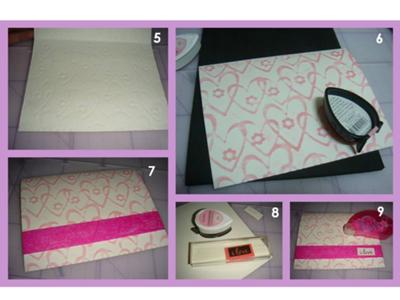
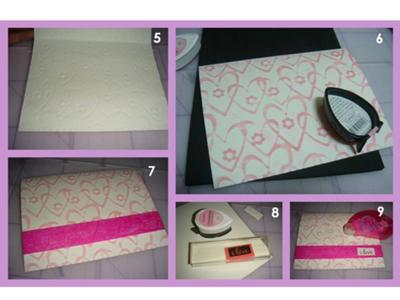
Photo 5 After running the cardstock onto the machine, your paper will now look like this.
Photo 6 Now, here's the exciting part of making this card. Instead of just settling with an embossed paper, it's better to add color. So, what I did was lightly brush my pink ink pad across the front of the card until the pattern (hearts and flowers) turns pink and become more visible. This way, you make the most of your embossing folder - it's like getting two designs out of one!
Photo 7 After that, adhere the pink ribbon at the lower portion of the card.
Photo 8 Next, I stamped my sentiment ("i love") on leftover papers, still using the pink ink for more coordination.
Photo 9 - I cut the outline of the sentiment then adhered it onto the ribbon, like so.
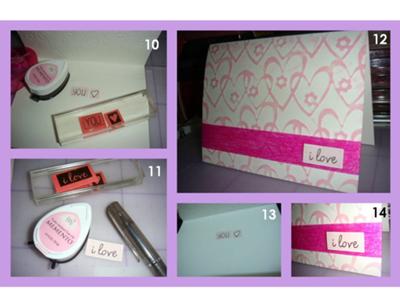
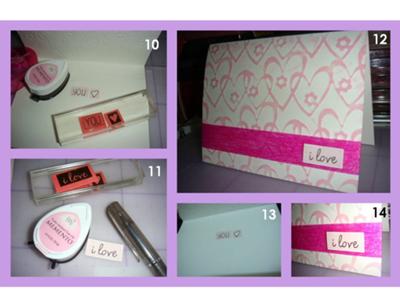
Photo 10 For the inside of the card, I stamped "you" and a heart as a continuation of the front card message.
Photo 11 Now, for the messages to be more visible, I just traced the stamped letters using a black sign pen.
Photo 12 That's it! This shows the finished product - a very easy-to-make card, but no one would think it was done in less than 5 minutes because of the sophistication the embossing brings ;)
Photo 13 The inside was purposely left as simple as that to give way to any personal, mushy message you may want to add.
Photo 14 A close-up of the sentiment
Visit Mai's blog, Publicly Private for more crafting projects!


Comments for Easy-to-Make I Love You Card
|
||
|
||
